This venerable kit was originally released back in the '90s, long before Revell's recent (and highly popular) assault on the 1/32 scale market. In common with the 1/32 Tornado which came along about the same time, this is a superb kit that, despite it's age, is hard to fault. It has recently been re-released with some new markings, but this is one of the originals that has been lingering in my stash for several years. Inspired by the re-release and the favourable reviews, I thought it was about time I did it some justice. I intended this being a pure "out of the box" build, and I managed to keep to that, almost.

The kit contains seven sprues of exquisitely moulded plastic. The surface details are suitably restrained, but deep enough to stand up to several coats of primer and paint. No sign of flash anywhere, and everything seems nice and crisp and begs to be built.
The instructions have you building the seat first, but I left this for now as I like to drop such things in at the end. The cockpit tub builds faultlessly. There are plenty of after market options out there to dress this up but I would argue that unless you are completely neurotic, it is really not necessary. The details supplied in the kit are superb and with a little careful painting they came up beautifully. The tub then fits into the two halves of the forward fuselage section perfectly and only a minimal amount of sanding was needed to get everything neatly finished. It is also necessary to install the nose undercarriage leg at this stage as once the wheel bay is put in place it is not possible to add it later (without some structural problems, anyhow). This is a shame, as normally I like to leave such things out until the end as they complicate masking and painting, but it was clear I had to comply in this case.

The nose cone was left off at this point, because I knew that a significant amount of nose weight would be needed (in common with all Hunter models) and I would apply it once the bulk of the model was built to ensure it was enough. But I went on to put together the rear fuselage halves (which again, fitted perfectly) and the intake structure. I have built various Hunter models over the years and they all have their own solution to the problem of the intake shape and the need for it to fit seamlessly into the wings. At the end of the day, the best solution comes down to accurate kit engineering, and Revell have done well here. The basic intake structure was built up and painted, and then fits, without gluing, between the forward and aft fuselage sections. The lack of glue is critical, as a small amount of play is necessary to get the wings around it.

Speaking of the wings, they are made up of several sections which does demand a little care in getting everything flush. Once they are done, they need to be carefully positioned over the intake section taking care to get them lined up into their recesses on the fuselage sides. I have had problems with this kind of approach in the past; and at first dry fit, it seemed like these may be troublesome too. However the play in the intake sections proved itself and with a little persuasion the wings clicked precisely into place. And what is more, they lined up almost perfectly with the intakes leaving virtually no visible seam. Well done kit designers!

A single moulding goes on to the top of the fuselage for the spine, which is very welcome as it saves a lot of seam smoothing. Also the forward canopy section fitted perfectly with just a dribble of filler to ensure no seams. I added the tail sections, and then was able to judge the nose weight requirement. It was a bit less than the 40 grams suggested, but better safe than sorry and I filled the nose section with packets of lead shot before attaching the nose cone.After masking up the canopy and wheel bay sections, she was ready for painting. All the undercarriage and other detail would go on afterwards.

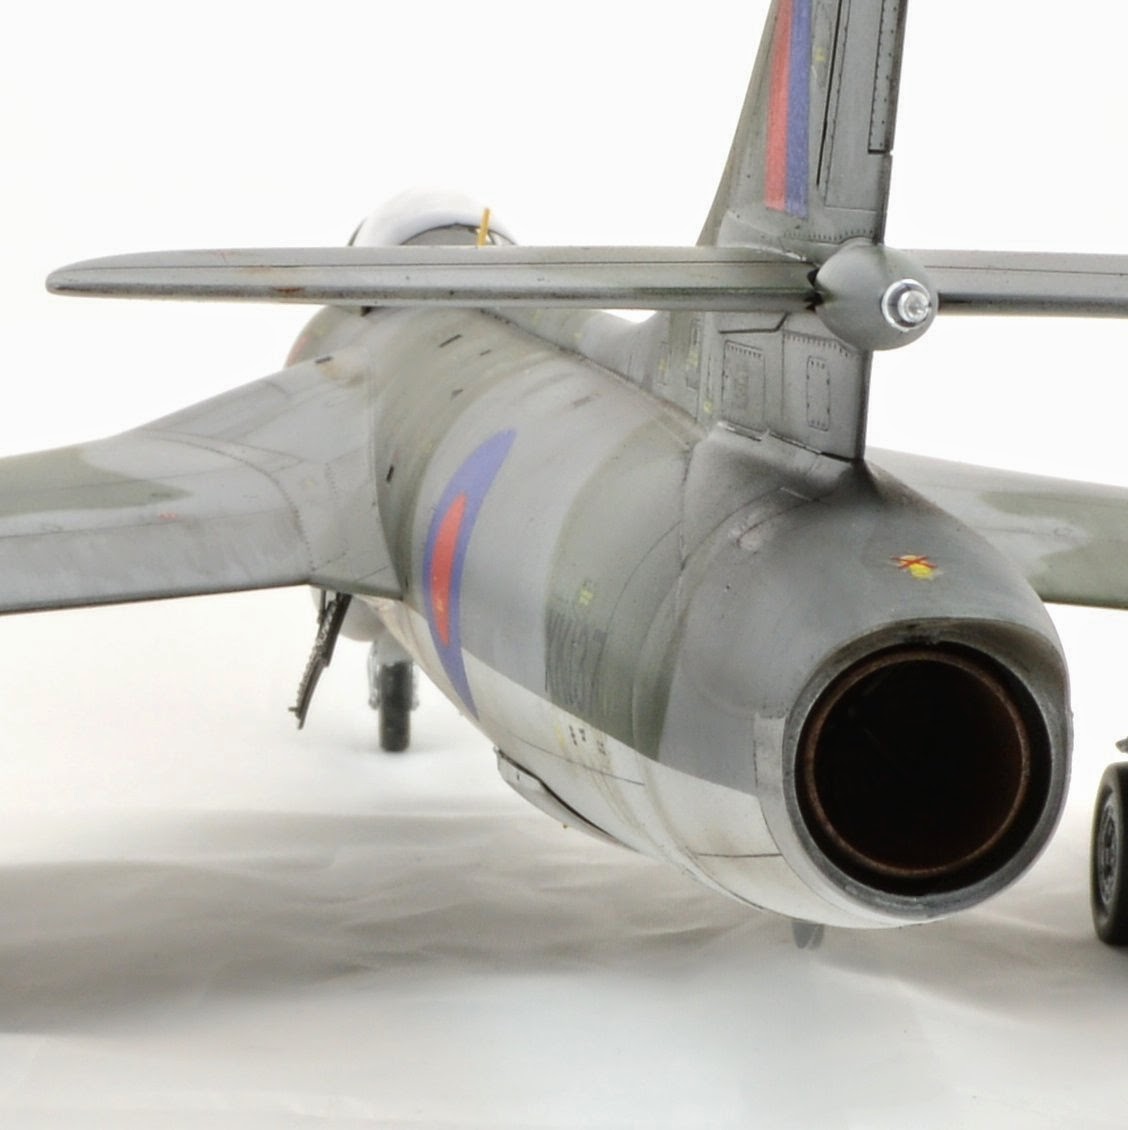
The whole model now got a coat of Tamiya primer. This is normally where you discover all the seams and flaws, but there were none, so I proceeded with the underside. The underside colour of R.A.F. Hunters is an often debated subject. But here is my solution which satisfies all parties. I mixed a "Light Aircraft Grey" colour from Tamiya "Sky Grey", "White" and "Buff". I then added a good slug of "Flat Aluminium". The end result looks both grey and silver, and matches any reference photo I can find - perfectly.
Moving on, the underside was masked off and the topside painted Dark Sea Grey. This was then "Blu Tack and tape" masked to the camouflage pattern and RAF dark green applied on top. I then used a weak "deck tan" mixture to add some subtle bleaching to the panels.

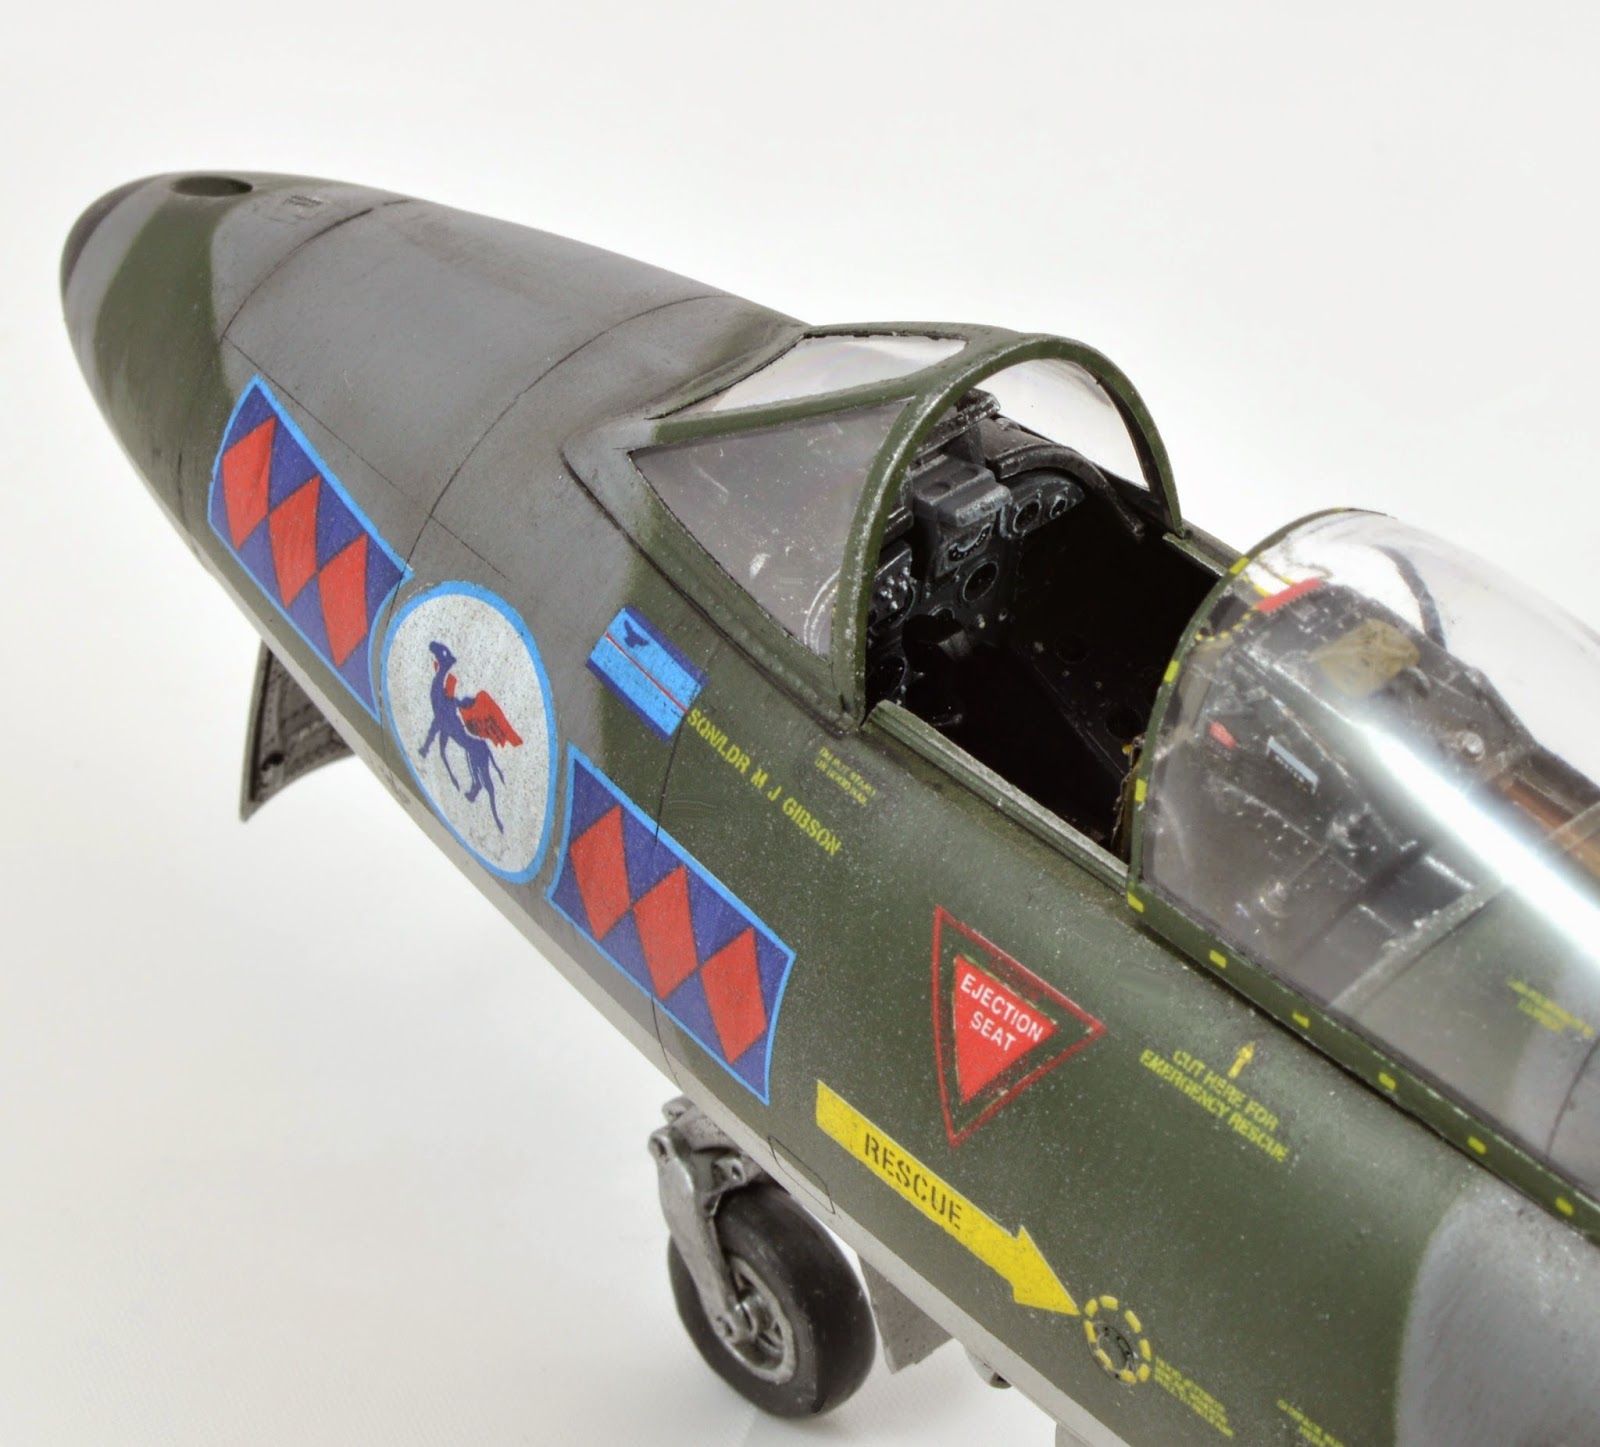
After a couple of coats of Klear, I started work on the decals. And here comes the only major disappointment of this kit. The decal sheet is one of Revell's early "Super Decal" sheets and is very comprehensive, with enough stencils to keep the most fastidious modeller busy for hours. But, my particular sheet had some serious register problems, with white edges bleeding out from many of the key markings. I suspect this problem has been fixed in the newer release but this is the old one, so I had to deal with it. Basically I had little option but to use a combination of careful cutting out and also a little patching up with a paintbrush in places to get an acceptable result. That said, some of the smaller stencils were so far gone they were unusable, and I had to raid the spares draw to find suitable replacements. This did detract from what otherwise I normally find a most enjoyable part of the build. But in the end I finished the markings and applied a black oil paint panel line wash, followed by a matt varnish and a little panel line post shading.

Attaching the undercarriage is a bit tricky due to the multi part nature of the gear door panels, but the excellent kit engineering meant they went in with a minimum of fuss. The under wing storage pylons caused me a little grief, the location holes are tiny and there is not a lot of purchase for them. Also, I had neglected to make the necessary holes for some of the exterior fins and had to drill them retrospectively - but that's my fault for not paying attention earlier on.
The final task, after a few bits of weathering work, was to construct the cockpit seat. It's a nice representation of the Martin Baker Mk 2, as good as you will find in injection plastic. I am sure a resin replacement would be that bit better, but it is perfectly serviceable as is. The only thing I changed was to remove the moulded on seat belts (why do they do that? It's horrible!) and replace them with some Eduard etch.
And she was finished. Did I keep to my "out of the box" approach? Just about. I did, as mentioned, replace the seat belts with Eduard ones, and I also replaced the shell ejector pipes by the gun bulges with brass tubing, and unless you count some decals being replaced due to the register problem, everything you see is from the kit.
In summary, decal issues aside, this is one of the most pleasurable builds I have done in some time. The kit is not that complex, but builds into a superb and large, imposing model of this most beautiful of aircraft. I am seriously tempted to buy another one very soon....
www.bowemodels.com